What is LoRa?
LoRaWAN is a high capacity, Long Range, open, Low Power Wide Area Network (LPWAN) standard designed for LoRa Powered IoT Solutions by the LoRa Alliance. LoRa is an RF modulation technology for LPWANs. The name is a reference to the extremely long-range data links that this technology enables.
LoRa was created by Semtech (https://www.semtech.com/lora) to standardize LPWANs: https://bit.ly/3K6g9hH
Designed to wirelessly connect battery operated things to the internet in regional, national or global networks, the LoRaWAN protocol leverages the unlicensed radio spectrum in the Industrial, Scientific and Medical (ISM) band.
Characteristics of LoRa

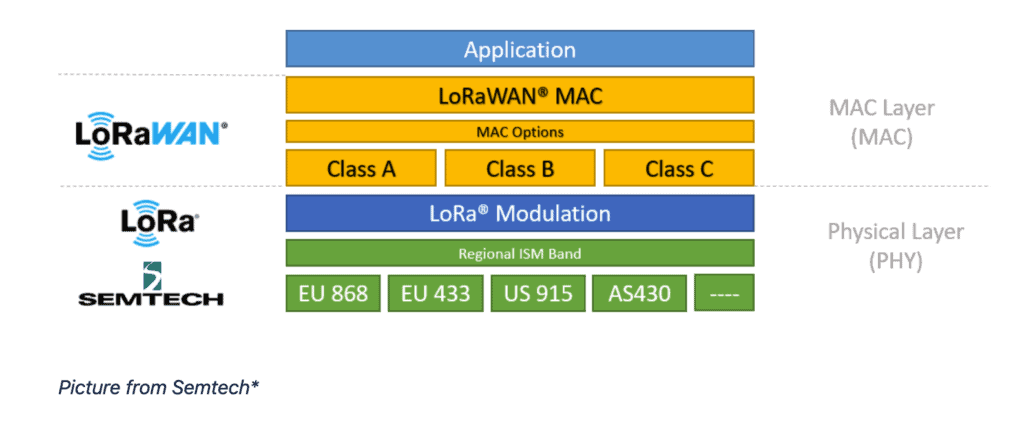
The technology stack below shows us how LoRaWAN operates. LoRa is the physical (PHY) layer, which means it is the wireless modulation used to create the long-range communication link. As the data layer, LoRaWAN is an open networking protocol that delivers secure bi-directional communication, mobility, and localization services standardized and maintained by the LoRa Alliance.
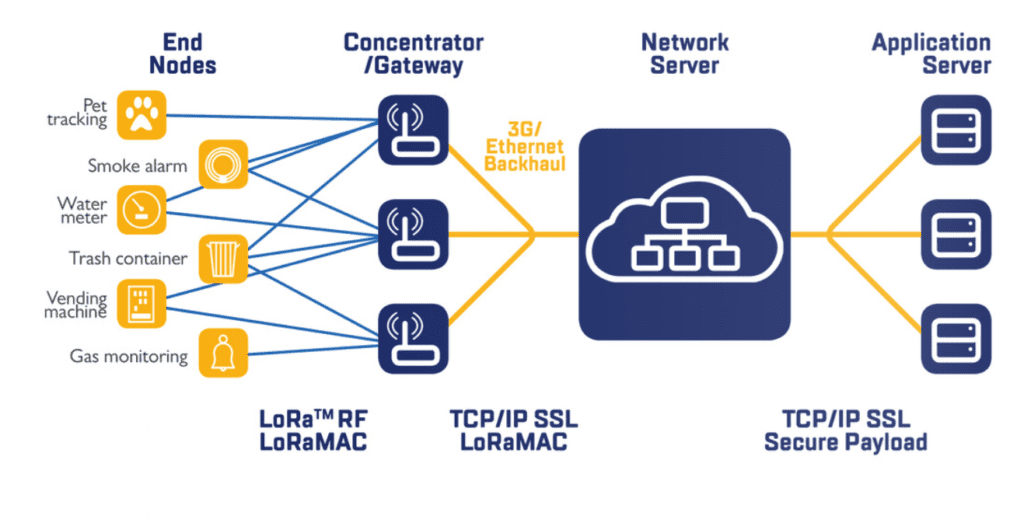
LoRaWAN uses the star network as opposed to Mesh. The typical network architecture is below:
LoRa Module Feature Sets
The LoRa Module from EDX is designed to plan, optimize, and simulate real-world scenarios ensuring a robust network that covers all devices and meets performance requirements.
The LoRa Module supports EU 868 and US 915 frequencies. Between these frequencies the majority of the globe is covered. The channel plans are as follows:
| Channel Plan | Common Name |
| EU863-870 | EU868 |
| US902-928 | US915 |
The frequency range designated to LoRa Technology in the United States, Canada, and South America is 902 to 928 MHz. This frequency range is known as the 915 MHz frequency band.
The LoRa Frequency band is divided into the following channels for US (Based on the FCC part 15 Document):
| Type | Channels | Frequency | Bandwidth |
| Uplink | 0 to 63 (64 channels) | 902.3 to 914.9 MHz (200 kHz increments) | 125 kHz |
| Uplink | 64 to 71 (8 channels) | 902.3 to 914.9 MHz (1.6 MHz increments) | 500 kHz |
| Downlink | 0 to 7 (8 channels) | 923.3 MHz to 927.5 MHz (600 kHz increments) | 500 kHz |
In SignalPro you can set the frequency in the system details, as below:
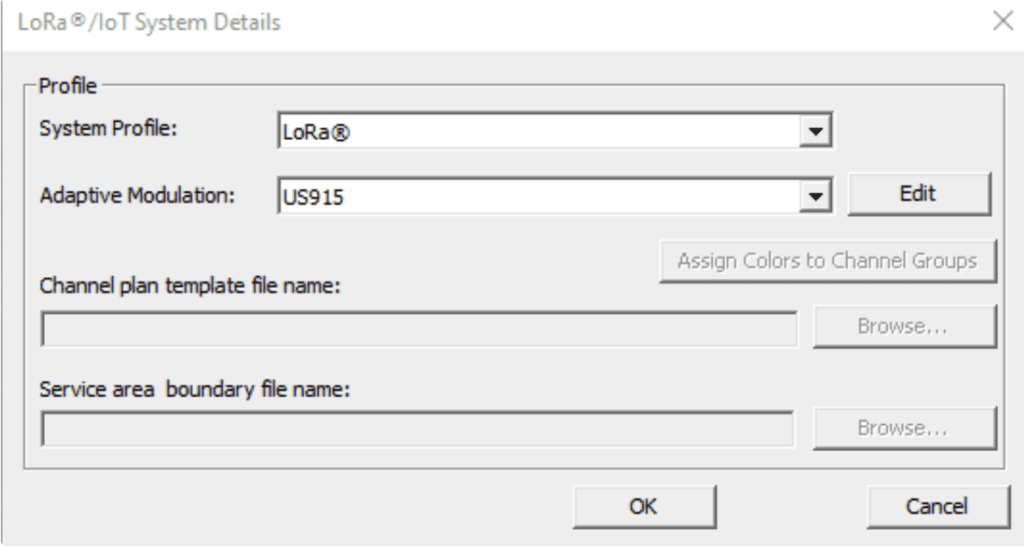
Selecting “Edit” in this GUI will open the Adaptive Modulation Editor, where you are able to define the Spreading Factor, Bandwidth, Data Rate, Power Offset, (C/I+N), Noise and Thresholds.
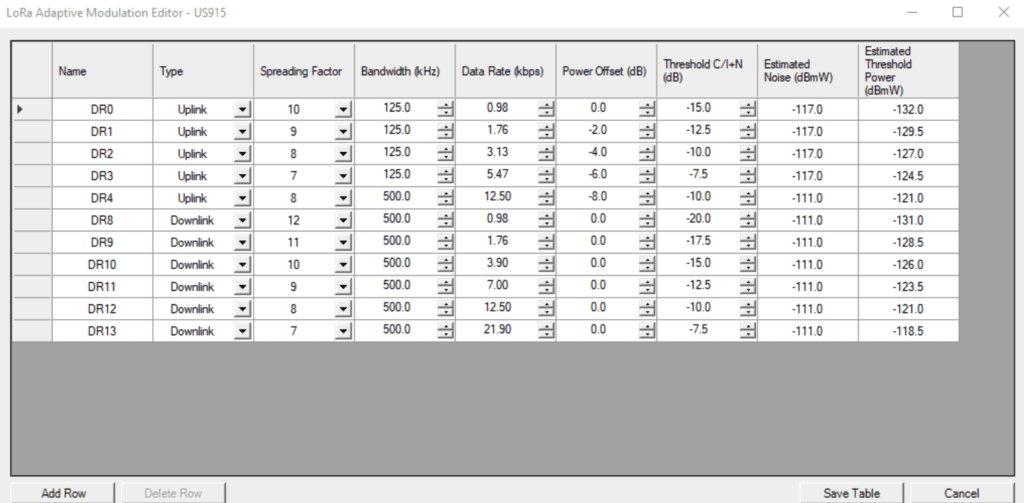
- For a fixed channel bandwidth, the higher the spreading factor, the higher the processing gain, resulting in an increase in sensitivity and therefore an increase in link budget. Subsequently, the time on air will also increase.
- Orthogonality between spreading factors allows for the transmission of multiple LoRa signals that are both on the same channel frequency and in the same time-slot.
- For a fixed SF, a narrower bandwidth will increase sensitivity as the bit rate is reduced.
- The Code Rate is the degree of redundancy implemented by the forward error correction (FEC) used to detect errors and correct them. This rate is fixed at 4/5 for the LoRaWAN protocol.
Spreading Factor
Spreading factor is what determines the speed of a chirp (a signal with frequency moving up or down [up-chirp or down-chirp respectively] with a different speed.)
LoRa is a spread spectrum based modulation, meaning the signals are essentially orthogonal to each other. When different spreading factors are transmitted on the same frequency channel, they do not interfere with each other; rather, the signal with different spreading factors is seen as noise.
Most importantly, as the spreading factor changes, the effective data rate also changes.
Making adaptive optimizations of an individual end node’s power levels and data rates allows for the preservation of battery life of connected end nodes.
The amount of spreading code applied to the original data signal is called the spreading factor (SF). There are a total of six spreading factors (SF7 to SF12). The larger the spreading factor used, the farther the signal will be able to travel and still be received without errors by the RF receiver.
| Data Rate (DR) | Spreading Factor (SF) | Channel Frequency | Uplink or Downlink | Bitrate (Bits/Sec) | Maximum User Payload Size (Bytes) |
| 0 | SF10 | 125 kHz | Uplink | 980 | 11 |
| 1 | SF9 | 125 kHz | Uplink | 1,760 | 53 |
| 2 | SF8 | 125 kHz | Uplink | 3,125 | 125 |
| 3 | SF7 | 125 kHz | Uplink | 5,470 | 242 |
| 4 | SF8 | 500 kHz | Uplink | 12,500 | 242 |
| 5-7 | |||||
| 8 | SF12 | 500 kHz | Downlink | 980 | 53 |
| 9 | SF11 | 500 kHz | Downlink | 1,760 | 129 |
| 10 | SF10 | 500 kHz | Downlink | 3,125 | 242 |
| 11 | SF9 | 500 kHz | Downlink | 5,470 | 242 |
| 12 | SF8 | 500 kHz | Downlink | 12,500 | 242 |
| 13 | SF8 | 500 kHz | Downlink | 21,900 | 242 |
SignalPro also supports the various topologies for LoRa deployments such as star topology with point to multipoint or point to point.
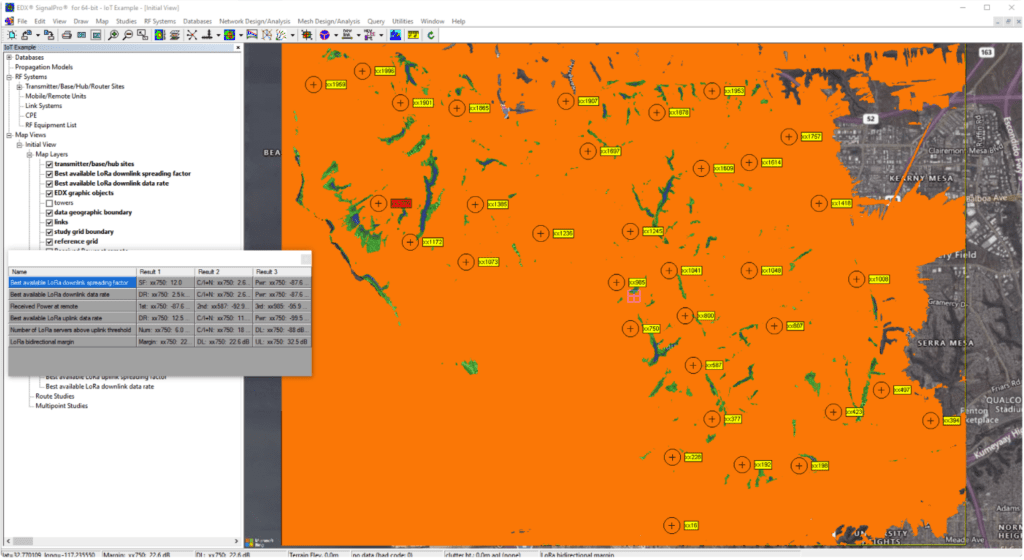
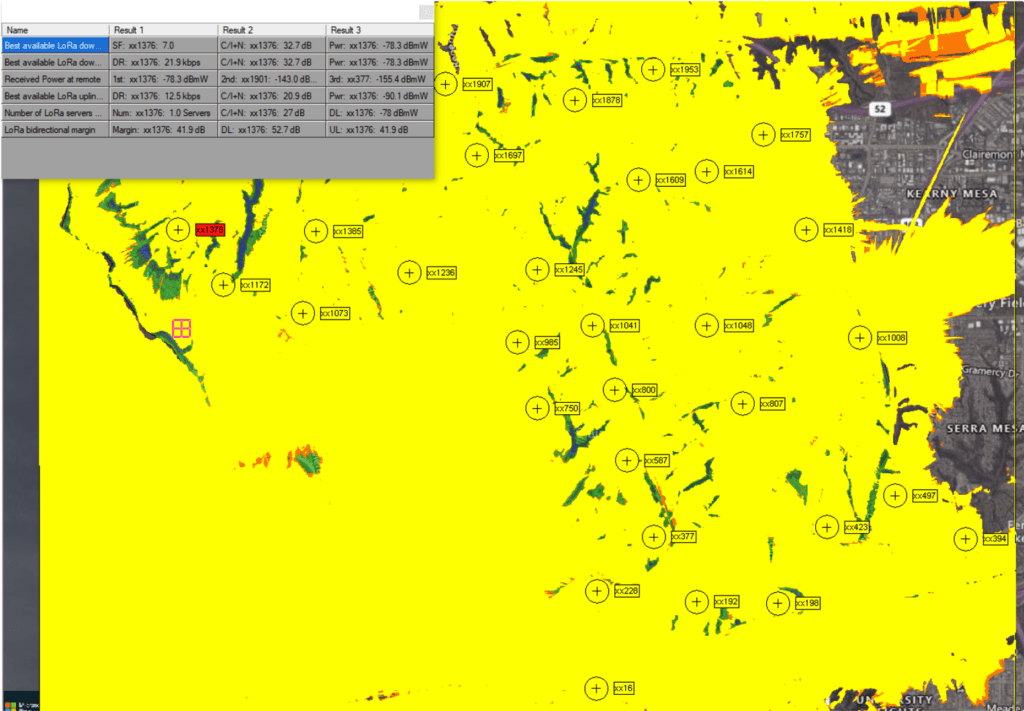
The studies included are:
- Best Available LoRa downlink data rate
- Best Available LoRa uplink data rate
- Number of LoRa servers above the uplink threshold
- LoRa optimized uplink transmit power
- LoRa bi-directional margin
- Best available LoRa downlink spreading factor
- Best available LoRa uplink spreading factor
Automatic Router Placement Features
The purpose of Automatic Router planning for the LoRa Module is to automate candidate planning using sophisticated algorithms based on inputs.
Once you have defined your LoRa sites, you may go into the Automatic Router planning dialog:
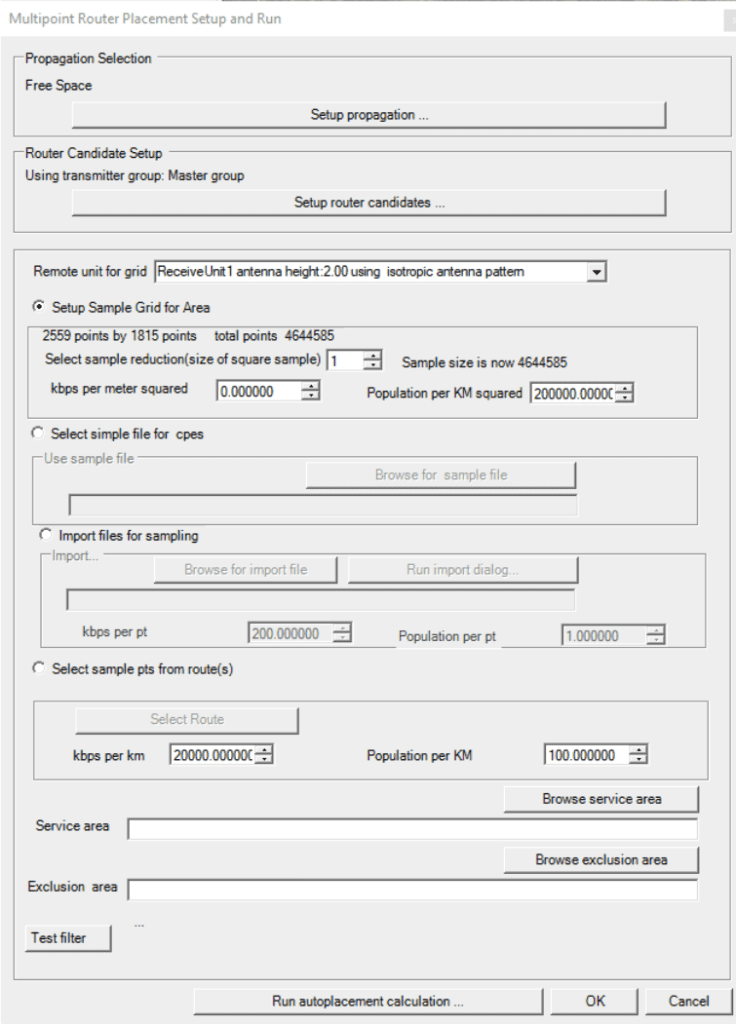
Working down this GUI, you may:
- Setup propagation rules and point spacing on the path
- Select router candidate sources (existing sites, Towers DB, or subset of towers)
- Choose Mobile/Remote unit
- Setup sample grid for area (sub-sample study grid for faster results)
- Browse to a Service Area polygon
The last selection is to Automatically calculate router locations:

- The ‘Use installed routers…’ option allows you to choose a Tx group of pre-existing sites that already contribute to area coverage. The Autoplacement routine assumes these sites are in operation and will try to add to them to cover the area.
- The ‘Output Options’ section lets you set a Tx group name for created sites or choose what to do with selected sites if you’re using pre-existing sites.
- Set the router range to the maximum possible connection distance and set the desired coverage threshold in dBm.
- You may choose from various autoplacement methods, but for this use case, we will choose ‘Method 3’ as it is specific for LoRa IoT systems.
When selecting ‘Method 3’ you are presented with this dialogue:

- “Select sample bna” is not required for most projects. If a .bna file with multiple polygon regions is selected here, the algorithm will find a router solution for each area independently. This can allow large projects with distinctly separate geographic areas to run more quickly.
- The router range and signal level threshold are carried over from the previous menu.
- Set the coverage limits: Max and Min coverage limits for candidate selection.
- The “Use costs for planning” checkbox allows the algorithm to consider relative costs of site locations in the solution.
- Values in the “Run Optimization” box configure how the algorithm chooses initial solutions to consider and how many iterations it runs in determining better solutions. Click the “Setup best grid and Tx separation” to have it automatically set the Tx separation and grid distance values. The number of trials and cooling steps can be increased to allow it to continue seeking better solutions, but the default values are often sufficient.
Select “Setup Modulation Scheme” and the following GUI appears:

- The modulation to be used on the uplink and downlink should be defined here, either from file, defaults, or create a new table. This will be used for the capacity plan
Once you run the plan, you are presented with a new window that will display the useful sites found and the subscribers they serve. It will display how many sites were found and what percent coverage they provide.
- You can also choose to add in additional sites with the “+add” button. When this button is turned on, you can simply click on the candidate locations to add new sites and see the subscriber units they serve.
- You can toggle routers active and inactive with the “X toggle” button. Routers and the design can be adjusted by toggling them “off.”

When the router locations are acceptable, click “Yes” at the bottom of the window to accept the new routers and the created transmitter group. You may also click “No” to reject the candidate routers and go back to the Optimized Capacity Planner and make adjustments.
In the capacity planner the report can be assessed and saved.
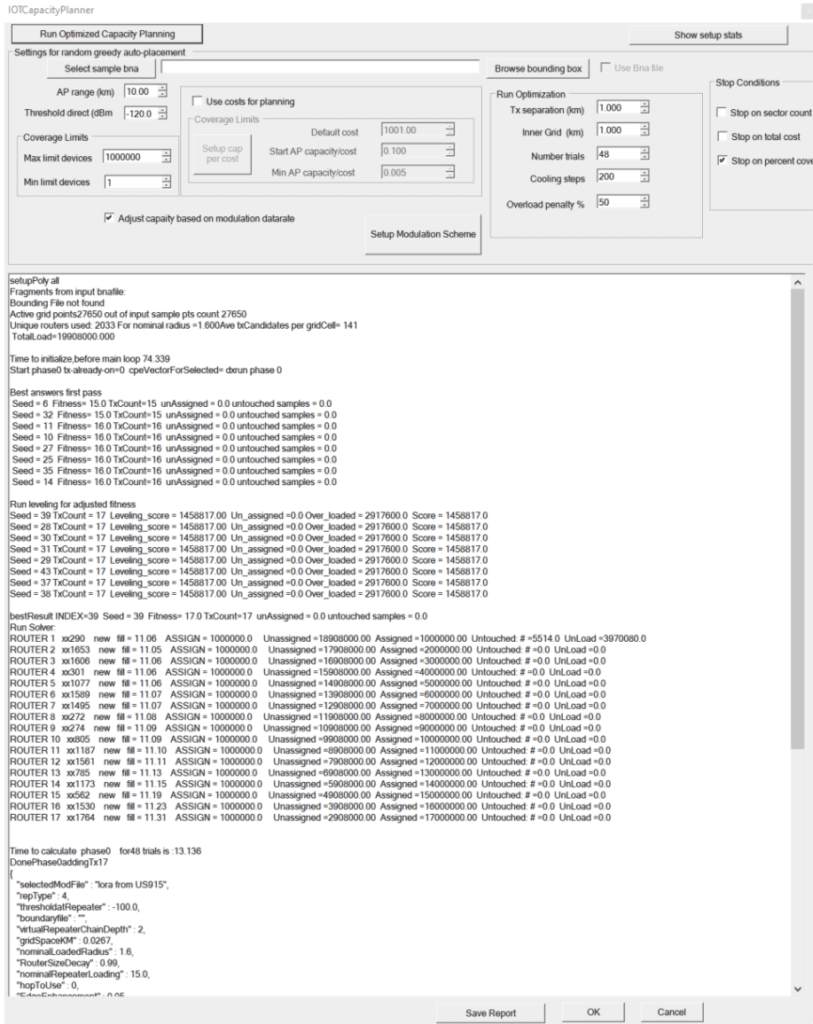
Choose to accept the plan and candidate sites from autoplacement, by selecting “OK.”
Below is the autoplacement selections with the towers (blue dots):
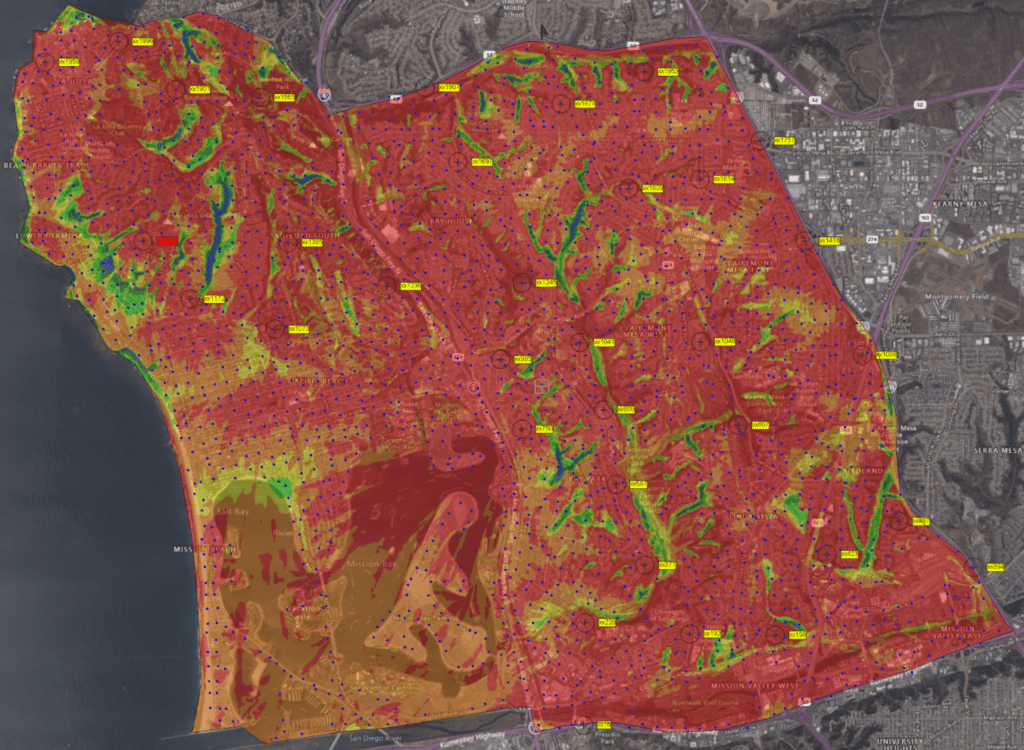
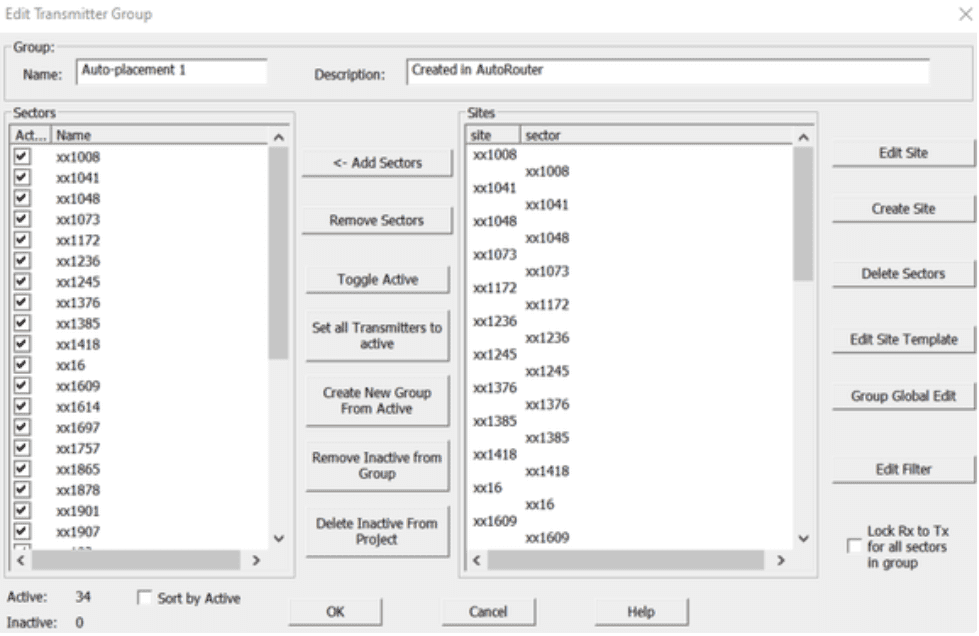
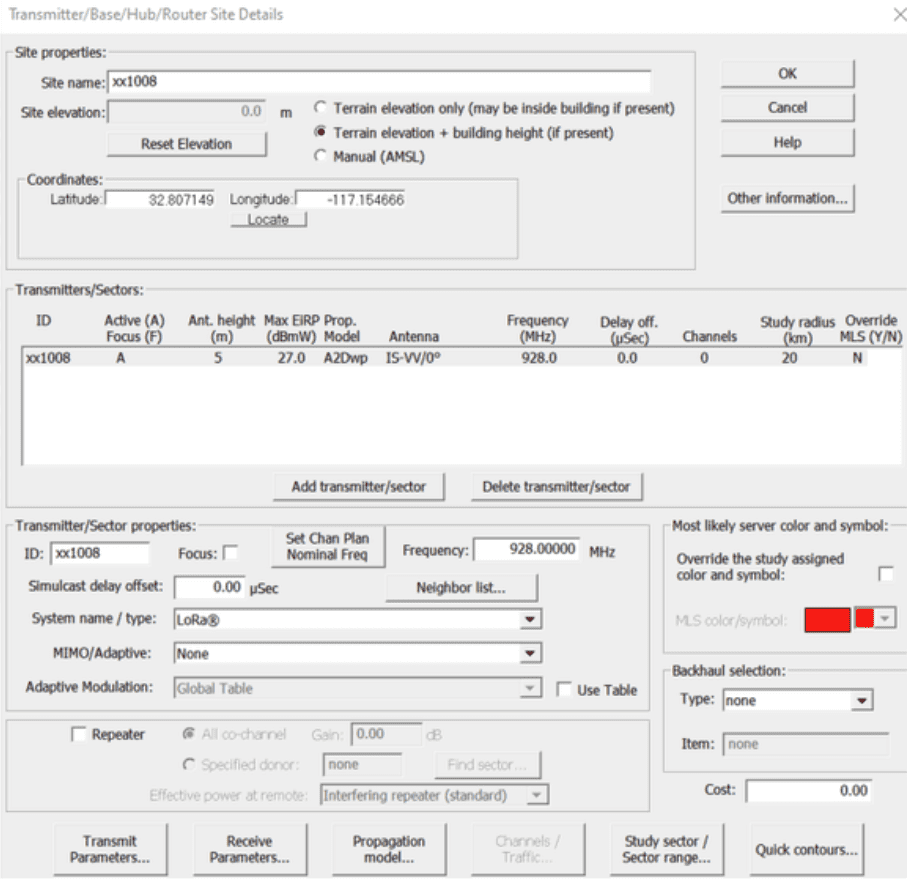
When you open the Tx database, you will find the new selections:
